
![]()
Wearable LEDs are all the rage! Do a quick search on Pinterest and Etsy and you’ll find oodles of wearable flashy-light projects – from simple jewelry to full LED-infused dresses and jackets. In this two-part blog, I’ll show you how to use your CodeX to control a pair of sparkling NeoPixel glasses. Imagine how cool you’ll look at that next party or robotics competition with sparkly LED rims flashing in animated patterns that you program!
Adding NeoPixels
The CodeX has four peripheral expansion plugs – two in the upper left and two in the upper right. You can use these expansion ports to control all kinds of add-on hardware including sensors, servos, and yes: NeoPixels.
NeoPixel strips need three wires: 5V power, ground, and the serial signal input. Each of the CodeX plugs has these three wires ready to go! Flip the CodeX over and look closely at the four plugs along the top:

The ground and signal pins are labeled with ‘G' and 'S’. The center pin is the 5V voltage to drive the pixels.
Collect all the Parts
You have the CodeX. Now let's gather the parts to make the glasses!
| Part | Description | Suggested Cost |
Suggested Source |
 |
Two 24-pixel Neopixel rings. |
$10 * 2 |
LED Ring Lamp Light
|
 |
Plastic costume glasses with no lenses. Find these at your local party store or costume shop. | $10 | |
 |
3 wire (or more) cable to run from glasses to the CodeX. Audio cables or USB cables are perfect. Look for 10-foot cables. | $11 | |
 |
3 female jumper wires to plug into CodeX. If you don’t have any on hand, get yourself an assortment for later use. | $6 (for assortment) | |
 |
If you don’t already have a soldering iron, get yourself a kit that includes everything you need. This suggested kit is perfect for light soldering work. | $10 | Soldering Kit |
 |
You need glue to hold the lenses (and wires) in place. Five-minute epoxy or super-glue is perfect. | $10 | Gorilla Epoxy |
Other Optional Parts
| Part | Description | Suggested Cost | Suggested Source |
 |
Instead of jumper wires, you might use an official latching connector at the CodeX. Get yourself a few of these for future CodeX expansion projects! | $2 | Cable Assembly |
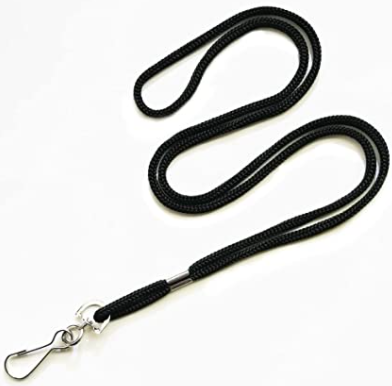 |
If you want to wear the CodeX around your neck, you’ll need a lanyard. Of course string or yarn works just fine too! | $6 (for 10) | Lanyard |
 |
You can use a knife and scissors to cut/strip wire. But do yourself a favor – get an official tool. You’ll find all kinds of options at your local home-improvement store. | $7 | Wire Stripper & Cutter |
Build the Glasses
A few years ago, Adafruit published a guide on making New Year’s Eve “Celebration Spectacles” with NeoPixel rings. Have a look at their guide (and video) before diving into our CodeX version: Celebration Spectacles.
First, we need to glue the NeoPixel rings to the plastic glasses. We will be making animations that cross both rings, so it is important to mount the rings in a known position. That way our code knows exactly where each of the 48 pixels is located in space.
Find the two solder holes labeled “IN” and “OUT” on your NeoPixel rings. Rotate each ring until these holes are at the top. The pixels at the top of each ring between these labels are the first (pixel 0) and last (pixel 23) pixels in the chain.
![]()
Glue both rings to the plastic frame with the first and last pixels at the top. Five minute epoxy is plenty strong and gives you a moment to adjust the placement of the rings before the glue sets. Pay attention to the four pixels at the bridge of the glasses where your nose will be. Our animations will cross the bridge of the glasses at these four pixels. Make sure they are aligned across from each other:

Now for the cable between the glasses and the CodeX. Decide how long you want the cable to be. I wear my CodeX around my neck so I can control the animations with the CodeX’s buttons. Three or four feet is plenty long enough. Another option is to put the CodeX in your pocket and run the cable under your shirt. You’ll need a four or five foot cable for that. A five foot cable gives you plenty of options, but you might end up with a dangling cable if you wear the CodeX around your neck!
Add an extra foot to your desired length and cut the cable. Carefully strip the outer layers from the extra foot of the cable. Strip a couple of inches from the other end (see photo below). Take your time with this step. Be careful not to nick the insulation on the individual wires. Finally, wrap some scotch tape around the ends to keep the braid from unraveling.

Cut the long exposed wires in half (6 inches). This gives you three wires to connect the two rings together.
Each ring has two PWR and two GND holes. Run a wire between a PWR and GND between the rings. Carefully measure the wires so they fit perfectly when wrapped around the inside of the frame. That way they are out of sight. As you are looking at the back of the glasses, wire the DOUT from the left ring (the one that will be closest to your left ear) to the DIN of the right ring.
Use a few tiny drops of glue to secure the wires against the frame.

Now tape the long-wire-end of the cable about halfway down the left arm of the glasses (see the photo below). Again, cut the long wires to the perfect length so you can hide them around the frame of the glasses and out of sight. Use tiny drops of glue to secure the wires against the frame.
Carefully note which color wire from the cable is soldered to which solder pad on the ring.

Finally, add the CodeX connector to the free end of the cable. Cut three of your female connector wires and solder them to the cable wires (see photo below). Straighten each wire into a line and wrap the bare metal solder joints with electrical tape to keep the wires from shorting together. Or better yet, use shrink tubing and a heat gun (or a match). You can see my shrink tubing on the wires in the photo below. I’ll slide those tubes down over the solder joints and heat them to shrink them firmly in place.
Pick a color code you can remember. I use a red female jumper for PWR, black for GND and blue or green for DIN. When you plug these jumpers into the CodeX, the red wire goes in the middle pin. The blue wire DIN goes to the signal pin “S”, and the black wire GND goes to the “G” pin.

Here is another pair of glasses with a latching connector instead of 3 jumper wires:

First Test
And now for the moment of truth! Connect your glasses to the CodeX peripheral port 0 (EXP0) and run the following test program. If your wiring is right, you’ll see all the pixels light up and twinkle with a random color!
If they don’t light up, then turn the CodeX off and carefully check your wiring. Make sure all the solder joints are good. Follow each wire color to make sure the CodeX pins end up at the right solder pads on the rings. Make sure the CodeX “S” wire connects to the first ring’s DIN and that DOUT of the first ring goes to DIN of the second ring.
import board
import codex
import neopixel
import time
import random

codex.power.enable_periph_vcc(True)

# IO13 = EXP0
# IO14 = EXP1
# IO10 = EXP2
# IO11 = EXP3

# Glasses are 'GRB' with 2 rings of 24 (total of 48)
neo = neopixel.NeoPixel(board.IO13, 48, pixel_order='GRB')

while True:

    for i in range(48):
        # values from 0 to 255, but this saves power (and isn't blinding)
        neo[i] = (random.randint(0,32),random.randint(0,32),random.randint(0,32))

    time.sleep(0.1)
Next Time
Congratulations! Your pixels are flashing! Parade around the house with your glasses on for all to see. While you are in the kitchen, grab yourself a soda and a snack to celebrate!
Oh, and now is a good time to clean up your desk. Look at all those scraps of wire and snippets of insulation and used tape. Are those solder blobs on the table? Those should scrape right up. And how about we put all those tools away before someone gets hurt on them? Heck, I sound like your mother.
In the next blog post, we’ll write the code to control those 48 pixels. That’s when the real fun begins.